
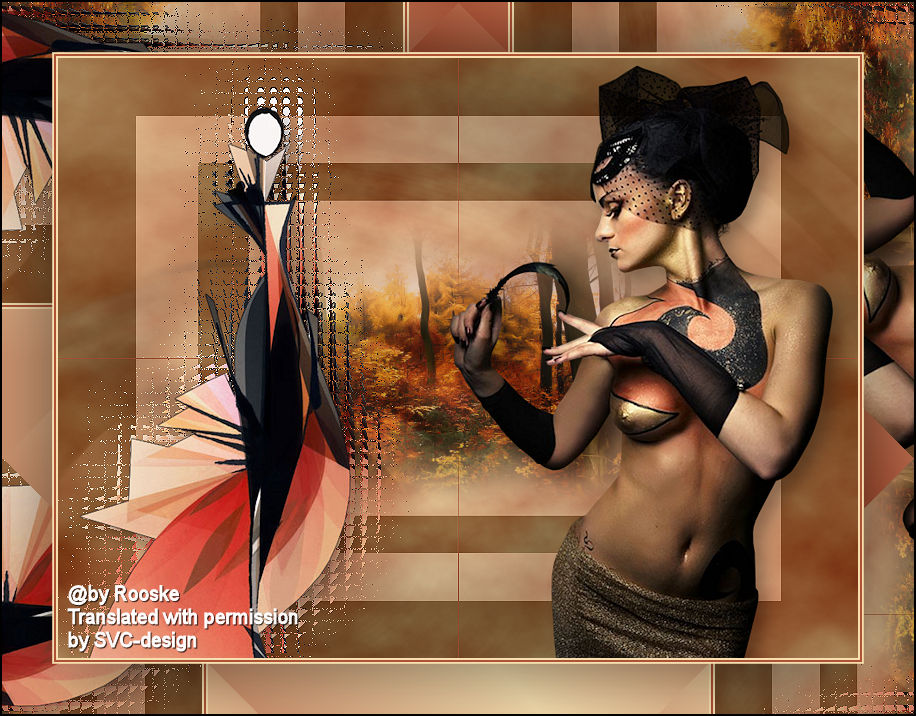
This lesson is made with PSPX9
But is good with other versions.
© by SvC-Design

Materialen Download :
Here
******************************************************************
Materials:
1293040016_paysages_nikita.psp
calguisart07042012.psp
SvB (450) Beauty.pspimage
******************************************************************
Plugin:
SvB (450) Beauty.pspimage
Plugin - filter Unlimited – Mock – Windo.
Plugin - Simple - Diamonds
Plugin - Unlimited 2.0 - Simple - Blintz
******************************************************************
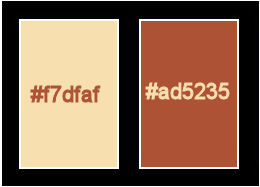
color palette
:
******************************************************************
methode
When using other tubes and colors, the mixing mode and / or layer coverage may differ
******************************************************************
General Preparations:
First install your filters for your PSP!
Masks: Save to your mask folder in PSP, unless noted otherwise
Texture & Pattern: Save to your Texture Folder in PSP
Selections: Save to your folder Selections in PSP
Open your tubes in PSP
******************************************************************
We will start - Have fun!
Remember to save your work on a regular basis
******************************************************************
Foreground: #f7dfaf
Background : #ad5235
Gradient: linear 45 - 2 - invert
1
Open a new transparent image of 800 x 600 pix.
2
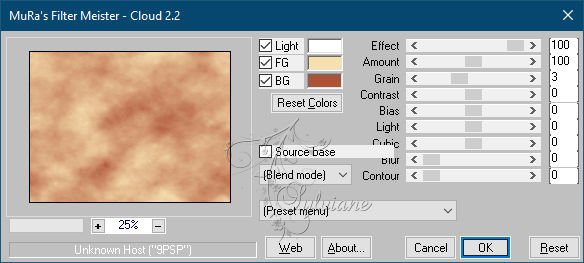
Plugin - MuRa's Meister – Clouds - default
3
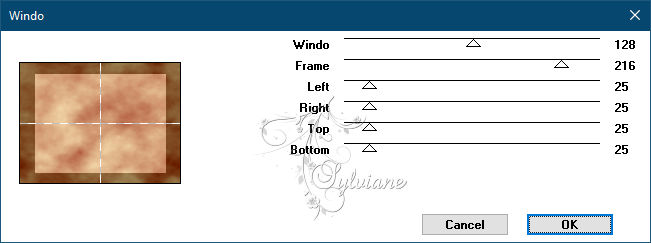
Plugin - filter Unlimited – Mock – Windo.
4
Layers – Duplicate
Resize image 65%, uncheck Resize all layers.
Layers - merge - merge down.
5
Layers – Duplicate
Plugin - Simple - Diamonds.
Blendmode : hard light
Layer Opacity 25.
6
Layer - new raster layer.
Layers – arrange – send to the bottom
Fill with background.
7
Activate the top layer.
8
Selection - Select All
Open SvB (450) Beauty.pspimage
Edit – Copy
Edit - Paste into selection
Selection - Select None
9
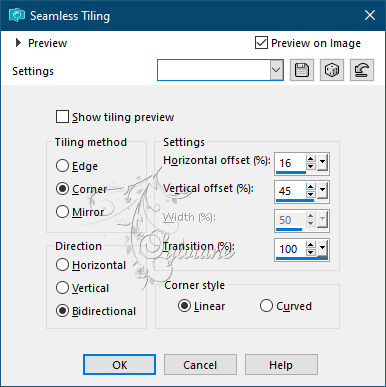
Effects - Image Effects - Seamless Tiling
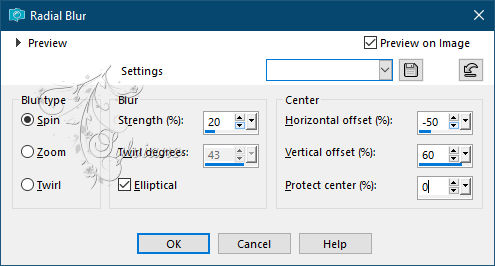
Adjust - Blur - Radial Blur.
10
Open calguisart07042012.psp
Edit - Copy
Edit - Paste as new layer
Stick on your creation.
Image - Resize 90%, uncheck Resize all layers.
Put them to the left.
11
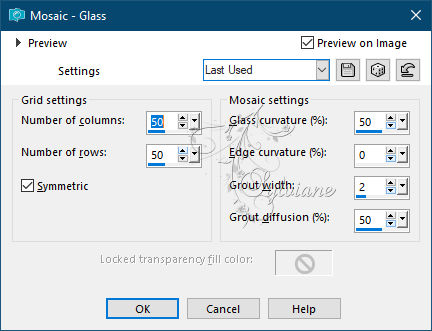
Effects - texture effects – Mosaic -Glass
Paste the same tube again on your work.
Resize image 86%, uncheck Resize all layers.
Effects - 3D effects - drop shadow
10/10/ 30 /27color:#000000
12
Close the 3 top layers.
Activate raster 1
Draw a selection in the frame.
Open 1293040016_paysages_nikita.psp
Edit – Copy
Edit - Paste into selection
Open the layers again.
13
Open SvB (450) Beauty.pspimage
Edit - Copy
Edit - Paste as new layer
Resize image 86%, uncheck Resize all layers
Effects - 3D effects - drop shadow.
Settings are good.
Put her on the right.
14
Layer – merge – merge all (flatten)
Adjust - sharpness - sharpen.
15
Image - Add Borders - 2 pix - color:foreground.
Image - Add Borders - 2 pix - color: background.
Image - Add Borders - 2 pix – color: foreground.
Image - Add Borders - 50 pix – color: background.
Select the last border and fill with gradient.
Plugin - Unlimited 2.0 - Simple - Blintz
Selections - Invert
Effects - 3D effects - drop shadow
20/20/ 30 /100. Color:#000000
Repeat with V + H on -20.
Selection - Select None
16
Image - Add Borders - 2 pix - color:#000000
17
Place your name or watermark and make your crea 600 pix longest side.
Save as JPEG
Back
Copyright Translation © 2021 by SvC-Design